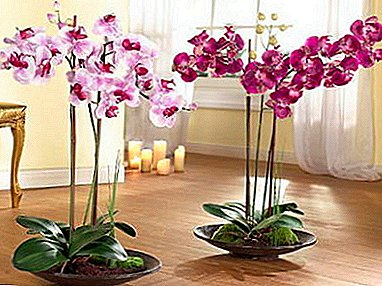
Despite their capriciousness orchids, are precisely those plants that reproduce in many different ways. This article will discuss reproduction by cuttings. This method has several options and gives good results.
But in order to get them, you need to follow some rules and provide the plant with the necessary conditions, which will be discussed in our article.
Cuttings
What is this process?
In orchids, the falenopsis cutting can be called the lateral process, faded flower stalks or old shoots not less than 10 cm long. Such shoots are used for reproduction. The main condition is the presence of buds, from which then the young leaves grow. Also, the stem is called the upper part of the stem with several roots, it is separated from the parent plant for reproduction.
Advantages and disadvantages
Benefits:
- The simplicity of the procedure and the possibility of it at home.
- No special training is required, even a newbie will cope with this procedure.
- In a short time you can get well-developed plants with the entire set of genetic qualities of the maternal orchid.
- Orchids grown from cuttings bloom quickly. Within 1-2 years, an adult, flowering plant will be formed.
Disadvantages:
- Problems with building roots. The orchid transplanted with cuttings is quite difficult to grow roots (if the peduncle was used). Sometimes the plant is sick for a long time.
- The need to follow the precautionary rules: disinfection of instruments, treatment of the cutoff site with fungicides.
- The complexity in the care of a plant after transplanting an orchid requires special care and attention.
- Low survival rate of cuttings.
When is it better to choose this method?
Cutting is best suited for monopodial orchid species, including phalaenopsis. Such plants do not have pseudobulb and can not multiply by dividing the bush. Also, this method is perfect for novice florists. Here you risk nothing. The worst thing that can happen is the death of the cuttings. The maternal plant does not suffer.
When you can propagate the orchid cuttings:
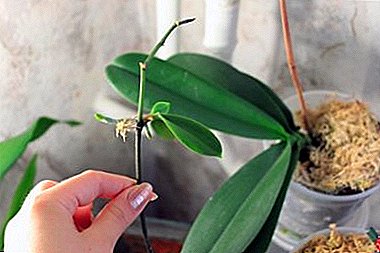 If the plant has faded flower spike or young aerial roots (if the top of the stem is taken).
- If the length of the shoot is not less than 10 cm and there are always kidneys on it.
- If the maternal orchid is adult (not younger than 2-3 years) and healthy. It should have at least 6-8 healthy sheets, there should be no pests on it.
- When it's spring outside. This is a time of active growth, it is most favorable for rooting shoots.
Step-by-step instruction
More often Orchid grafting is carried out in two ways: by separating the top of the stem or by cutting off the flowering peduncle. Both of these methods can be applied at home.
Process selection
If used as a cutting faded flower spike. Before separating it from the mother plant, they wait for the moment when the orchid will completely bloom. The peduncle is cut with a sterile instrument, and divided into several cuttings of 5-7 cm. If the top of the stem is used, it is cut only when there are several healthy and juicy roots on it.
Circumcision and cut-off treatment
- The peduncle is cut closer to the base, and the cut points are treated with a weak solution of potassium permanganate, then powdered with coal powder (crushed activated carbon).
- The cut is processed both on a maternal plant, and on the cut handle.
- After this, the peduncle is divided into parts, for this purpose a sterile blade or a sharp scalpel is used, the cuts are made at a slight angle.
- All sections are treated with a fungicide (antifungal) and powdered with coal powder.
- When separating the upper part of the stem, it is cut with a sterile instrument, leaving a few roots on the handle, and cut sections are treated with a weak solution of potassium permanganate.
Video tutorial on the selection of the process is attached:
Pot and Ground Preparation
 In advance should be purchased fresh or dry sphagnum moss, it will serve as a ground for rooting cuttings. As a greenhouse you can use a container of medium size.
- The moss is placed on the bottom of the container, then plentifully sprayed with a solution of a biostimulator.
- From above spread the cuttings (cut from the peduncle) at a distance of about 1.5-2 cm from each other.
- The container is covered with a plastic bag or glass, and put in a warm and bright place.
- As for the separated top, then it will need the usual soil, as for an adult orchid (chopped and sterilized tree bark, sphagnum moss) and a small transparent pot with holes.
Rooting
In order for the cuttings to take root, it will take about a month.
- At the same time the greenhouse is ventilated every day.
- Substrate moisturize regularly, the soil should not dry out.
- The air temperature inside the greenhouse is not lower than 26-28 degrees, the humidity is 70%.
- Light day for rooting shoots - at least 14 hours, if necessary, you need to use a photo lamp.
- Water to moisten the substrate must necessarily be separated or filtered at room temperature. Some growers are advised to use boiled water.
On a young plant, 2-3 roots should be 3-4 cm long. In this state, it is already able to feed itself and it can be transplanted into a pot.
Video tutorial on rooting orchids attached:
Planting in a pot
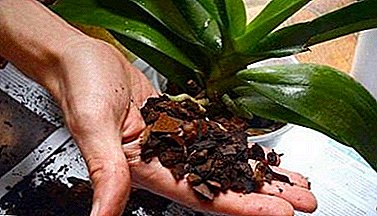 After the appearance of the roots and young leaves, shoots are transplanted into a small transparent pot with holes. The substrate is the same as the adult plant.
- Before planting, all components of the substrate are sterilized, for this purpose they are maintained with a fungicide.
- Then steamed in the oven so that the young plant was not susceptible to fungal or infectious diseases.
- If the reproduction is carried out cut off the top, then it immediately planted in the prepared soil.
- For this, the bottom of the pot is covered with perlite (to retain moisture), a cutting is placed there and holding it with a hand, fill the pot with chopped wood bark and moss.
- Top cover with a transparent bag or half of the cut plastic bottle.
Attention! In no case should the greenhouse with cuttings be in direct sunlight. But at the same time, they need sufficient illumination. The best option is a shaded southern sill.
Video lesson on landing kids attached:
Aftercare
All subsequent care is aimed at building up new roots and leaves, as well as on active growth. As already mentioned, the care of a young plant is the same as for an adult orchid. The only difference is that after transplantation, it needs to leave greenhouse conditions. At the same time every day airing the orchid, with each passing day increasing the time.
 A month later, you can transfer the plant to the mode of open air. Also in a month you can make the first feeding. For this it is better to use liquid mineral fertilizer for orchids. For the first feeding the dosage should be reduced by 2 times and observe the reaction of the plant. If new roots do not appear for a long time, then the orchid is watered with a solution of Kornevin (reduce the dosage by 2 times the recommended). Fertilizers are allowed to be applied only in wet soil.
Conditions for young orchids:
- Temperature - 25-28 degrees.
- Humidity 50-60%.
- Watering as the soil dries (2-3 times a week).
- Regular spraying (2-3 times a week).
- Additional lighting in cloudy weather.
- Monthly feeding.
Even a beginner can cope with orchid grafting. But this does not mean that everything will turn out the first time. According to statistics, out of 10 transplanted cuttings, 2-3 specimens survive. And that's fine. Even with the best care, the orchid still remains a capricious and demanding flower. So stock up with as many shoots as you can to get some healthy plants.


 If the plant has faded flower spike or young aerial roots (if the top of the stem is taken).
 After the appearance of the roots and young leaves, shoots are transplanted into a small transparent pot with holes. The substrate is the same as the adult plant.
