Pheasants are exotic birds that today have not received high popularity among Russian breeders. Nevertheless, there are farmers who are engaged in breeding pheasants chicks.
To do this, they mainly use the incubator, as the females have a weak maternal instinct. How to choose and lay the eggs of pheasants in the incubator will be discussed in this article.
What is this process?
 Incubation is the process by which egg develops. Today, this is an excellent option for obtaining healthy offspring, when the female lacks the ability to incubate.
But for this, the farmer must approach this responsibly. It is important to properly conduct preparatory work and create favorable conditions for the development of embryos.
Benefits
The process of breeding pheasants in the incubator has many advantages:
- The process allows you to multiply brood.
- No need to keep a hen and spend time taking care of her.
- Savings on feeding for a hen.
Recommendation! It should be remembered that artificial hatching of pheasant eggs is a difficult and time-consuming task.
Selection and storage
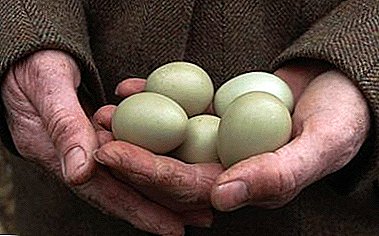
Pheasant eggs are smaller in size.. But here they can have a different color: all shades of green and gray. Many farmers note that it is best to lay light gray material. But the green shell leads to frequent loss of embryos.
For successful brood, you need to choose eggs of large size, the correct shape of the oval. If you use small specimens with a thin shell, elongated, the embryos may die or lag behind in development.
When selecting a material, specimens with such defects cannot be used.:
 2 yolks;
- shell damage;
- bloody spots;
- enlarged pores.
If there is a diluted protein, it means that the poultry diet is broken, it does not have enough vitamins. Cracks in the egg can be removed with a patch. Before laying the material it is necessary to sort it by size: small, medium and large. Each group of eggs is laid separately.
Preparing to bookmark
Disinfection
For detoxification use the following drugs:
- Formalin.
- Bleaching powder.
- Ozone.
- Lysol.
- Preparations group BB.
- Polydez.
- Bactericide.
- Virotsi.
- Virkon-S.
The first disinfection is performed right in the house, no later than 1-2 hours after the demolition.
Dirt removal
Do not wash the eggs before laying in the incubator. If there are minor contaminants, then remove them with a soft brush.
Stages of embryo development
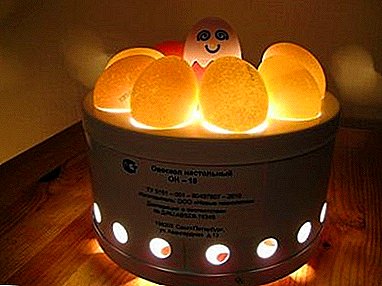 With the aid of an ovoscope, the field is clearly visible in the place of the embryo, sometimes stretched by a light grid of thin blood vessels. In the depths of this field there is a shadow of the embryo. This can be detected if the embryo moves. At a certain distance from the place under which the germ is concentrated, large and well-developed blood vessels are visible on the yolk.
If the development is impaired, the embryo takes on small sizes, it is not immersed in the yolk, concentrated close to the shell and clearly visible. The circulatory system is poorly developed, and the yolk blood vessels are directed towards the embryo itself.
- By performing a second scan (after 7–8 days of incubation) with the aid of an ovoscope, one can see well-developed embryos, allantois lines the entire shell inside the egg and captures all the protein and is washed off at the sharp end. Often there is a small distance between its edges, which closes after a while. The germ is dark and has a large size.
When the embryo lags behind in development, allantois growth stops. Near the sharp end of the egg, a facet of the pink-colored allantois is noticeable, and at the sharp end of the egg is light protein. This suggests that the embryo is small.
- The third screening should be performed at the end of the incubation. Thanks to him, he manages to isolate the material in which the embryos died after the second scanning, and also to assess the development of embryos in the second half of incubation.
IMPORTANT: When the embryo is alive and developing normally, then already at the time of the third translucence, it occupies the entire egg. During ovoskopii can detect its shape and movement.
When the embryo is alive, but its development is delayed, then at the sharp end of the egg there is a bright transparent spot, in which there are no blood vessels. The embryos that died during translucence are presented in the form of a dark shapeless motionless mass.
What can be incubators
 Today there are several types of systems for incubation. The most common is a plastic incubator that can be painted or finished with a metal sheet. For artificial planting pheasants eggs used incubator for other poultry.
Heating of the device is due to the lamps, which are concentrated on the cover. To maintain the temperature regime, the incubator is equipped with a thermostat. For normal development of embryos, according to the norms, the humidity should be 50-70%. In the incubator, the moisture regime can be maintained using water vapor. To do this, you need to install containers with water. For ventilation on the lid and the walls of the device to make holes.
Read how to make an incubator yourself, in this article.
Timing
For pheasants, the incubation period is 4-5 weeks.
rules
To obtain healthy offspring, you must observe the following rules.:
- The temperature in the first 3 weeks is 37.5-37.8 degrees.
- Starting from 4-1 weeks, the temperature is lowered to 37.5-37.4 degrees.
- Turn the material only from the 3rd to the 18th day.
Mode table at home
| Period | Timing | Temperature | Humidity | Turn | Cooling |
| 1 | 1-7 day | 37,8 | 60-65% | 4 times a day | - |
| 2 | 8-14 day | 37,8 | 60-65% | 4-6 times a day | - |
| 3 | 15-21 days | 37,8 | 60-65% | 4-6 times a day | 1-2 times a day. |
| 4 | 22-24 day | 37,5 | 75-80% | - | - |
Step by step detailed instructions
When all the preparatory work has been completed, the equipment is ready, then you can proceed to the next item, the tab of the material.
- indouin;
- peacock;
- turkeys;
- geese;
- guinea fowl;
- ostriches;
- weft;
- musk duck;
- quails.
Bookmark
 Before sending the material to the incubator, hold the eggs in warm water for 1-2 hours. Himself turn on the device in test mode 24 hours before the bookmark. This is necessary in order to check its functioning and create the necessary microclimate.
If the eggs are different in size, then divide them into batches. First, the largest are laid, and then the smaller ones. Between bookmarks should be observed time interval of 3-4 hours. Thus, you can breed chicks at one time.
Translucent
Proper incubation of pheasant eggs includes the x-ray of the eggs in the ovoscope. The first time ovoskopirovaniya performed to determine unfertilized eggs. Do it on day 9-14.
On the 9th day, the embryo is small, but its development can be assessed by the position of the embryo in the egg. Normal is the position where the embryo is concentrated in the center of the yolk.
On the 14th day allantois closes at the sharp end of the egg. If this does not happen, then the embryo is retarded or perished. Last time ovoskopirovaniya carried out before hatching birds. The chick must be mobile.
The most common mistakes
Incubation of pheasant eggs at home is accompanied by certain errors. This should include:
 low quality parent stock;
- non-compliance with the storage conditions of the material;
- the material has not been cleaned and has long been stored;
- material has not been viewed on the instructor;
- the incubator was not run in test mode;
- there is no statistics.
These errors reduce the hatchability of chicks.
First steps after elimination
After hatching on the 3rd week, leave the chicks in the incubator so that they are completely dry. Next chicks to move to a prepared place (nursery). Healthy individuals will have the following characteristics:
- brilliant plumage and strong legs;
- reaction to sounds, chicks actively move;
- the eyes of the chicks are slightly bulging, clear, the beak is short;
- the umbilical cord is soft, the belly is not sagging.
Growing pheasants is not as easy as it may seem at first glance. The first difficulty that arises is the lack of maternal instinct in the hen. Thus, farmers resort to the incubator, sometimes eggs can be put under the chicken. By following these simple rules, you can get healthy and fully developed offspring.


 2 yolks;
 With the aid of an ovoscope, the field is clearly visible in the place of the embryo, sometimes stretched by a light grid of thin blood vessels. In the depths of this field there is a shadow of the embryo. This can be detected if the embryo moves. At a certain distance from the place under which the germ is concentrated, large and well-developed blood vessels are visible on the yolk.
 low quality parent stock;

