A do-it-yourself bird feeder is a great way to enjoy wildlife. If you live in an area where many birds live, a few well-located feeders will allow you to look at the birds quite close and enjoy their beauty. You do not need to buy an expensive feeder. You can easily make it yourself. In addition, feeders can be a salvation for birds. Winter is a difficult time for our feathered friends: under the thick snow they find it hard to get their food. Most types of bird feeders are low cost and take up very little of your time.
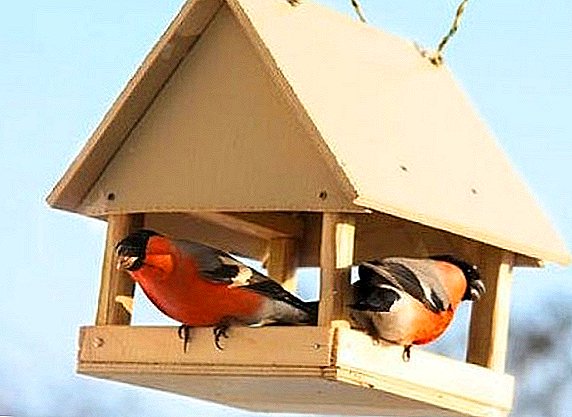
Street feeder for birds: familiar with the design
According to the constructive decision and the choice of material, bird feeders can be very diverse. But a good manger must meet several important requirements. The design should have:
- The roof, allowing to protect the food from rain and snow. Sedimentary fodder is not suitable for consumption.
- Convenient wide opening that will allow feathered to easily get inside and also easy to get out of the feeder.
- Durable manufacturing material, suitable for harsh winter conditions. Winter bird feeders must withstand temperature extremes and high humidity.
 It is also important to choose the right food for the birds and an acceptable place for feeding.
Standard food for birds is:
- millet;
- white bread crumbs;
- sunflower seeds;
- pieces of unsalted bacon (bacon attracts tits, nuthatches, woodpeckers).
The easiest options for making bird feeders
You should not be limited to wooden building materials. Feather feeders can be constructed from various simple scrap materials. Most feeders do not require complex drawings or special skills. In fact, from everything you can make an excellent street feeder.
Tetrapack or box feeder
A tetrapack feeder (juice box) is a simple and cheap design that takes just 10 minutes to make. You will need two washed liter juice boxes, wire or string, a stationery knife and a construction stapler. The food in this feeder is reliably protected from wind and moisture, and the bright packaging attracts birds. However, there are drawbacks: there is no feed in the tank. 
 So, let's see how to make the feeder out of the juice box. One box will serve as a tank for food, the second is needed for the roof. On the wide edge of one of the boxes with a knife cut a rectangular hole. We turn to the second box: on the two long and one short sides, draw a line exactly in the middle, along which we cut the box into two parts with a knife. The roof for the feeder is ready. Next, with a stapler, wire or rope we connect the roof and the tank for food. Further, for suspension, we also make punctures in the upper part and push the string or wire through them. The bird house is ready. Now you know how to make an original feeder out of cardboard.
Important! Do not forget to leave strips 6-8 mm wide on the long side of the feed box. This is necessary so that the birds can comfortably cling to their paws. over the edge. And in order not to accumulate water in the feeder, be sure to make several holes at the bottom from the inside.

How to make a bird feeder from a plastic bottle
To empty plastic bottle got a second life, find out how to make a bird feeder out of it. The plastic bottle feeder is a spacious house where birds can freely eat food. It takes 15 minutes to make such a feeder. You can take a bottle of 1-2 liters, but it is desirable to use a 5-liter bottle. On each side of the bottle with scissors, carefully make large cuts (outs). The edges of the holes should be processed. The upper part of each exit is not cut to the end, so that it can be bent at the top. Thus, you get a canopy that protects the feeder from snow and rain.  In the bottle cap, make two holes for lace or fishing line. That's the whole process of creating a feeder. This structure is the most common and simple version of how to make a bird feeder with your own hands. However, such a feeder is quite light, and any movement of the wind can shake it, so it will not be superfluous to put some cargo on its bottom.
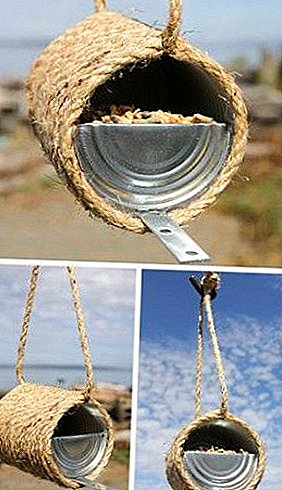
Tin Can Feeder Option
The bird feeder can be made even from a tin can. It is easy to work with banks, and they like little birds. You need to use containers of coffee, cocoa, lemonade or paint. The process of creating this option feeders should connect the children. The children will then be able to carry such a bird feeder to kindergarten in order to teach their friends how to make it. Works are performed in the following sequence:
 First you need to process the edges of tin cans.
- Further, it is desirable for banks to give a presentable look: they need to be painted. Choose any shades to your taste. After painting, allow the banks to dry thoroughly.
- Next we need a wooden stick (perch) with a length of 10 cm. For example, a stick from ice cream. Sticks are needed so that the birds can comfortably sit before a meal. With the help of superglue attach the "wood" to the banks.
- Now you need to take care of the suspension of tin. To do this, you can use any rope, cords or multi-colored ribbon.
- Our little feeders are ready. It remains to hang them on the trees and fill the feed. Since these feeders are quite small, do not forget to replenish the stock of grain from time to time.
 First you need to process the edges of tin cans.
Important! Tin can need nweigh strictly in a horizontal position. therefore cords to the banks is desirable to glue. And then try to keep the feeder hanging evenly.
Pumpkin Feeder
Unusually original troughs for wild birds will be designs from a round gourd. Make a wide hole in the pumpkin, which will be the future entrance for the birds. Remove the inside of the fetus. Next, make special holes for hanging. You can use a solid rope, wire or chain. It remains to choose the right place to accommodate our unusual feeders. For example, a pumpkin can be hung to a tree branch. Bright pumpkin will serve as a magnificent decoration of the garden. This trough looks elegant and unusual. 
Feeding trough "with a reserve"
Feeder "with a reserve" is the so-called bird "dining room" with automatic feeding. Let's get acquainted with the features of this design, its advantages and possible disadvantages.
How to make a feeder with a spoon
Another option of bird feeders from plastic bottles is original compositions with spoons that you can make with your own hands. This design is not the most convenient option, but it is easy to build. You will need a regular plastic bottle (1 l or 2 l) and a wooden spoon. On both sides of the bottle, it is necessary to cut slits in which two wooden spoons can be placed. Holes must be parallel. Then the bottle is filled with food to the top. The pips are automatically poured into a spoon in small portions. Thus, continuous feed is ensured. The resulting product is very fond of birds. Feathered travelers can sit comfortably on a spoon. 
Bunker design
Bunker design is the most convenient, practical and effective in all indicators feeding trough. This design was borrowed in agriculture. In the process of eating food by a bird from the bunker the next portion is automatically filled. This trough will last more than one winter. A homemade bunker bird feeder can be created from completely different materials: from a cup with a saucer, from a box, from the same plastic bottle, from boards, etc. Modern materials allow you to collect a bunker feeder in just 5 minutes.
Did you know? One of the main advantages of the bunker trough is that it helps to solve the problem of "discrimination" of one bird species by another. Often a flock of some species, for example, tits or sparrow, occupies an advantageous position in the trough and seeks to prevent the grains of other birds. It is in such cases that homemade bunker troughs, also known as anti-sparing, can be useful.The bunker design consists of two parts: a tray and a bunker. First, prepare a drawing in which all the details are displayed. Dimensions of this bird feeder: 40 x 30 x 30 cm. All material should be carefully marked. The base is cut from the board, the roof is made of plywood, and the racks (30 cm each) are made of 2 x 2 cm lumber. The racks are mounted on the bottom in a vertical position with a small indentation. On top of the racks mounted roof of a piece of plywood. Our bunker trough is ready.
Beautiful bird feeder: how to make plywood
The classic wooden tree feeder is a beautiful and functional mini-house for feathered travelers. The following version of the feeder allows the feed in portions to enter the bird "dining room".
Drawings and preparation of materials
For construction you will need the following materials:
- boards 20 cm wide;
- moisture resistant plywood (or plexiglas) 16 mm thick;
- screws, screws, wooden edges, glue;
- furniture hinges;
- milling machine;
- grinding machine.
Making trough: step by step instructions
Works are performed in the following order:
- Feeder parts are cut from boards 20 cm wide and plywood 16 mm thick. Sometimes plexiglass is used instead of plywood. To fix the Plexiglas using a milling machine in the side walls of the grooves are cut to a depth of 4 mm.
- Side panel dimensions of plexiglass bird feeder: 160 to 260 mm. Thanks to the transparency of plexiglass, you can easily monitor the presence of feed in the house.
- Screws, screws, wooden edges, glue are used to fasten the feeder parts.
- Be sure to sand the corners of the structure with a grinding machine.
- The role of the perch in this trough performs a round plank. It is attached to the edges of the side drilled into 10 mm holes.
- To assemble the roof, fasten the right half of the roof and the ridge between them. The left half is securely fastened to the side walls. With the help of furniture hinges, we fix both halves of the roof into a single structure.
- The gap formed between the plexiglass and the bottom of the product allows you to control the supply of food: one refill of the feeder can be enough for 2-3 weeks.
- The product is almost ready. As a finishing touch the house can be painted to your taste.
Did you know? Activists in many European countries often paint homemade beautiful bird feeders, and then decorate city parks with them. Public organizations are conducting similar work in order to attract people's attention and raise awareness of the need and relevance of such practices.You can feed the birds not only in winter, but also in summer, especially if you live in a private house. Besides the fact that bird houses are great for hanging on your own porch, they will be the perfect gift for other wildlife lovers. So why not make a bird feeder as a gift yourself, because now you know how to do it.