 Everyone who has experience in potato cultivation is familiar with the manual technology of hilling bushes.
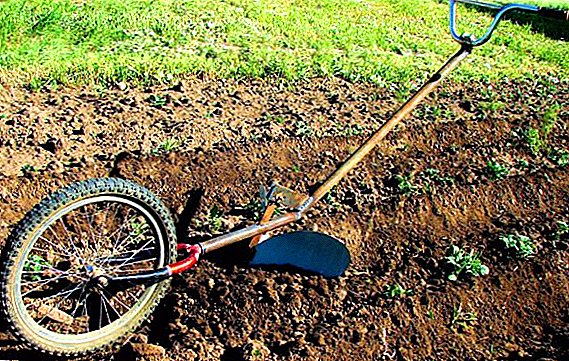
In order to facilitate this process, you can make an excavator from a bicycle with your own hands.
Operating principle
How to reduce your work, easy to understand. The principle of homemade hiller for potatoes is simple.
Did you know? In Europe, they began to grow potatoes in the middle of the XVI century.The main part of the unit, which goes deeper into the ground by 10-15 cm, is made of a conical shape or in the shape of an arrowhead. The blades are placed at such an angle that the earth in the aisle is moved to the desired width and sprinkled a number of potatoes. The width will depend on the width of the row.
 This part is attached to the bicycle frame with a steering wheel. It is the whole machine that controls the steering wheel. And most of all facilitates the work of the wheel that moves in front.
Familiarize yourself with the cultivation of such varieties of potatoes: "Kiwi", "Luck", "Gala", "Irbitsky", "Blue", "Queen Anna".
In this way, The process of hilling potatoes is performed by the following actions:
- deepen into the ground;
- move it using the wheel;
- by steering control unit.
Did you know? The ridge method of planting potatoes came from Holland, so it is also called Dutch.
How to make a rock plaster for potatoes with your own hands
How to make a rock plaster for potatoes with your own hands, you can understand by reading our article. This is easy for the owner, who has the necessary tools, an unnecessary old bicycle, a cultivator section and, of course, desire. 
Materials and tools
For the manufacture of manual potato tillers with their own hands, first of all, the cultivator part is needed. Here you can use the finished section of the usual tractor cultivator, you can cook the cultivator, placing the blades at the right angle. It will take the frame of an old Soviet bicycle with one wheel (26-28 inches).  From the wheel it is better to remove the rubber, leaving the rim "naked." The metal hits the ground better, so the finished unit is easier to control. On the frame should be a steering wheel.
  Naturally, you will need both bicycle keys and wrenches.
Manufacturing process
The manufacturing process will consist of several stages.
Important! In the manufacturing process, follow safety instructions.
- The first stage is preparatory.
 If there is no cultivator section, you need to prepare the metal to weld it yourself.
- The second stage - the manufacture of the unit.
Simplify the process of planting potatoes will help potato planters, and if you grow a lot of potatoes on the site, you should think about the need for potato harvesters for harvesting. It can be made independently.
 The removal of this section must be adjusted so that it is convenient to walk away from the hiller. In the place where the saddle stood, set the steering wheel. Tightly tighten the bicycle key. Height adjustable for your height.
In addition, be sure to very tightly tighten or tightly brew the front fork so that it stands "dead" and does not turn. If there is no finished cultivator section, then it needs to be cooked. Here is a special calculation. It is necessary that the width of the excavator was 2/3 of the row width. The angle of the welded blades must not be sharp in order to capture the ground well (approximately 80-90 °).
Important! The following injuries are possible in the event of violation of safety engineering of welding operations: electric shock, burns from slag and metal droplets, mechanical injuries.You can wear a belt on the front to work together. For the belt pulls the first, manages - the second. To okuchnik easier to hit the ground, you can attach a load to it.
Other options for hillers
Okuchnik can be bought in the finished form, but do it yourself cheaper and easier (without leaving home). There are also many options for homemade hillers: from a wheelbarrow, from a sidecar, from a tricycle, from a bicycle wheel and a pipe, etc. For a manual hiller from a wheelbarrow, a frame with a wheel is taken as the basis. On it the section of a cultivator fastens. Driven by handles wheelbarrows. 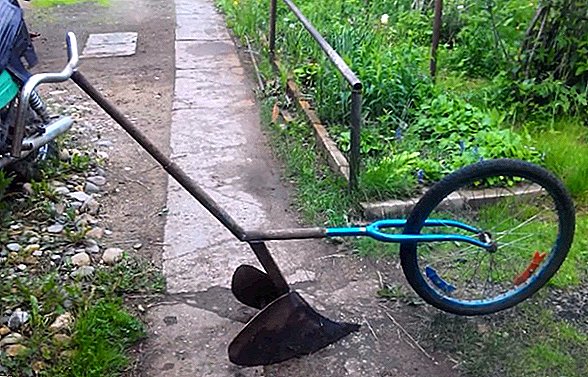 Okuchnik of a children's tricycle can be done by removing the seat and the front wheel. Ready tractor cultivator is not suitable here. It is necessary on the inside of the frame next to the wheels at a certain angle to weld the blades. Such a design will move along the row, and not along the aisle. Hiller of the stroller is made on the same principle.
One of the options, how to make a manual okuchnik with our own hands, we showed in this article. This self-made unit can perform a variety of work on the site, especially if you change the nozzle: weed, loosen, cultivate, etc. Moreover, one person can carry out these works with ease.


