The stove in the house will fill your home with comfort and warmth in cool and damp weather. How nice it is to gather in the evening with the whole family at the stove to listen to the crackling of burning firewood and the steady buzz of flame. Many homeowners would like to fold their own furnace in the house, so in this article we will try to consider in detail how to get down to this difficult task and successfully complete it.
Advantages and disadvantages
The advantages of stove in the house:
- reducing the consumption of gas or electricity for cooking and heating the house, which saves money;
- independence from centralized gas and electricity supply;
- the opportunity to bask in the "live" cozy fire.
 Disadvantages:
- the need for significant financial costs for firewood and coal;
- hard chopping wood;
- daily cleaning of the stove from burned wood and ash;
- seasonal or quarterly chimney cleaning;
- rapid lowering of the temperature in the house without regularly throwing firewood;
- the oven takes up quite a lot of space.
Did you know? According to Slavic beliefs, a brownie lives in the house behind the stove - a good spirit and master of the house. In the old days, every night he was given a cup of milk near the stove. Brownie did not like dirt and quarrels in the house and, angry, could express his displeasure with a night knock, rustle or weaving of horse manes and tails into small, difficultly unwinding pigtails.
Types of brick stoves for home
Home stoves differ from each other in design, shape and decoration. Can be folded rectangular, square or circular design. Such diversity will allow to choose the best option for a specific project, taking into account the purpose of the stove and the interior of the room where the structure will be located.
Oven options
Russian stove - a fairly large building, which occupies a central place in the house. The design includes heating the room, a cooking chamber for cooking and baking bakery products. The presence of the cooking compartment of the oven allows you to prepare food in accordance with recipes that simply can not be cooked differently. The design of the Russian stove has another important feature - a bed in its upper part for sleeping. In the old days, basking in the Russian stove, people treated all sorts of illnesses (colds, arthritis, and backache). 
Dutch stove - The efficiency of this structure reaches only 60%. In fact, it is a stove with a firebox and a smoke removal system (chimney). These stoves are often used in small homes, but only for heating, they can not cook food. The lack of a cooking surface makes the hot air heat the brick walls of the stove and the indoor air more efficiently. 
Stove for bath - This design provides wood heating. Usually, the front of the stove goes into the waiting room, from where the wood is laid. The rear part of the structure is located behind the partition that separates the waiting room directly from the bath. Instead of complex smoke passages, a metal water boiler is built into the back of the structure. The stove in the bath has two functions: it quickly heats the room (within an hour or two) and the water for washing. With the help of this furnace, the bath heats up very quickly, but it also cools quickly (without regularly throwing wood).  Brick stove with branched chimneys - the construction provides for the presence of multiple passages in the back wall of the stove, often such a wall is a partition between adjacent rooms. The submerged stove heats up, and in order to get into the chimney, hot smoke passes through a complex system of smoke passages in the wall and as a result heats the brickwork strongly. This design often includes a built-in front cast iron hob.
Learn how to build a Dutch stove, a long-burning stove and a Buleryan stove.
It is located on specially arranged internal brick ledges directly above the firebox for wood or coal, it almost always has one or two round opening openings. Round openings on the hob are closed with special diaper rings of different diameters made of cast iron. These openings are used for cooking, with their help they add or reduce the temperature under the pans with cooking food.
Hot water stove - such a construction is usually identical to a brick stove with branched smoke passages, but there is one significant difference in it: a metal water tank is built into the firebox for firewood. This water boiler is connected to the heating system in the house, and when the stove is heated, the water in the boiler heats up at the same time. Expanding, the water enters the pipes of the heating system. This design is one of the most efficient and energy efficient, and it also involves cooking. 
Important! In the case when the stove is located near the wall, convection currents of cold air coming from the doors and windows actively move around the house. As a result, residents will constantly feel cold and drafts around the floor.
Oven device
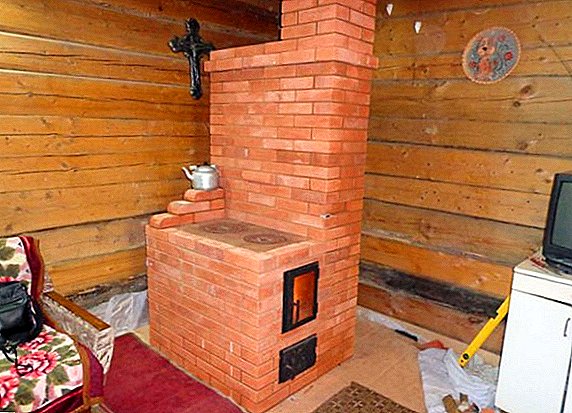
Small brick ovens are designed to heat homes of no more than 50-60 square meters. Depending on which design of the furnace was taken as a sample, on which fuel it works, heat transfer to the room will depend. The most common model of the stove is a brick (with a firebox and cast-iron cooking surface) located inside the house so that the front side is located in the kitchen, and the back wall of the stove complements the dividing wall between the rooms. Some ovens have an oven. Such a brick oven may well not have a hob or oven, and serve only for space heating. Dampers in the chimney (views) are always provided in the furnaces.
We recommend reading about how to put the socket and the switch, how to remove the paint from the walls, whitewash from the ceiling, how to glue the wallpaper, how to whiten the ceiling, how to make a plasterboard partition with a doorway, and also how to sheathe the walls with plasterboard.
The furnace can be used in different modes: summer and winter. In the summer, use the summer chimney flap (directing smoke directly into the chimney). In the warm season, the oven can be used for cooking, drying herbs and mushrooms, heating water, steaming grain, or compound feed for poultry and livestock. In winter, use the winter flap in the chimney. It is opened only during the kindling of the furnace, after the fire is hot, the valve is covered. A covered flap directs smoke from the stove to a complex system of passages located in the rear wall.  Hot smoke perfectly heats the brick wall, this heat will hold for 6-10 hours. Winter flap (view) is not fully closed, it remains ajar. A small gap will leave traction in the chimney and will not allow carbon monoxide to penetrate into the dwelling (pull it out). At the same time, an almost closed flap serves as an obstacle for drawing heat to the street through the chimney. If a metal tank for water connected to the heating system in the house is provided for in the stove, in addition to the warm stove walls, all the batteries will be warm in the room.
Important! The furnace must always be located on a concrete or brick foundation. This is necessary for fire safety and for support, as the design is very heavy.
The main components of the stove:
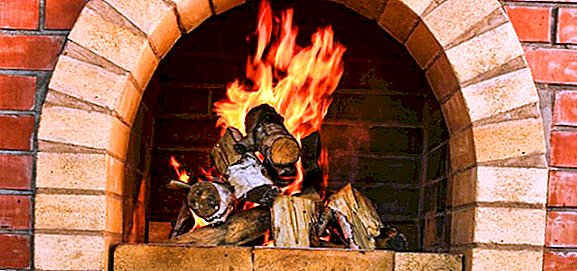
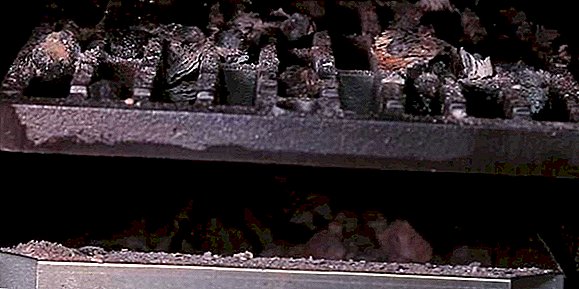
- Firebox - it is provided in any design and is one of the main components of the thermal unit. The firebox must have the maximum possible value for placing firewood or other fuel to ensure maximum performance of the structure. The size of the furnace in different designs may vary, since this parameter depends on the type of solid fuel. In wood-burning stoves, the height of the combustion chamber ranges from 40 to 100 cm. The furnace is fully laid out of heat-resistant and refractory bricks, its walls must be at least a quarter of a brick, and there is always a door made of cast iron or refractory glass. The lower part of the furnace chamber is made in the form of a cast-iron grate, through which ash and fine coals are showered into the chamber for ashes.
- Ashtray or ash chamber - This compartment is smaller in size than the firebox, and is also necessarily equipped with a door. The ashpit is located directly under the grate-bottom of the furnace section. It is used to collect ash and to supply air flow (blowing from the bottom) into the combustion chamber. Air blowing from the bottom along with the chimney creates cravings and is necessary to kindle a flame. The height of the ash chamber corresponds to the height of three bricks laid flat.
- Chimney - One of the main elements that is present in all modern stoves. Inside, the chimney resembles a closed labyrinth through which hot smoke moves. Thanks to this movement, the brick walls in which the passages are located are heated up, and the air in the room is heated from the hot walls.


Did you know? In 1919, the American Alice Parker invented the first central heating system. Her invention allowed homeowners to heat their homes more efficiently and subsequently led to the creation of an air-fired coal-fired wall-mounted stove in 1935, equipped with an electric fan and air duct.
Materials and tools
In order to build a furnace, you will need construction tools:
- trowel required for laying and removing fixing bricks mortar;
- a bricklayer’s hammer (pickaxe) for shrinkage of a brick laid on a mortar;
- metal jointing for tracing seams between bricks;
- electric saw "Bulgarian" for cutting bricks into pieces;
- electric mixer for mixing mortar;
- metal bucket (with a capacity of 10-12 liters);
- shovel sovok and large metal tank for mixing mortar;
- metal sieve for sifting sand and cement with a mesh of not more than 2 mm.
You will certainly be interested to read about how to build a swimming pool, bath, toilet, BBQ, cellar and veranda.
Required measuring tools:
- a plumb for checking the angles for verticality;
- angular level to check the corners of the structure;
- construction metal or fabric tape measure;
- meter “rule” with which the wall surface is checked for evenness;
- cardboard templates of all openings provided in the design;
- water level to check the laying horizon;
- flexible level.

Necessary materials:
- The material for the construction of the stove is heat-resistant and fire-resistant red brick, smooth and solid. Bruised or poorly dried bricks with voids and cracks do not fit. A well-burnt brick makes a clear and clear sound when tapping. A dull sound means incomplete heat treatment or burning a brick.
- A solution for bonding bricks - cement mortar in this case is not suitable. A mixture of sand and a viscous clay is used as the binder solution.
Make a stove - stove for heating problem.
Checking the quality of the solution
Before starting work, it is important to check the quality of the resulting solution from sand, water and clay. To do this, take a small amount of the solution from the batch and roll the ball out of it. After the clay ball dries, check if there are any cracks on it. If there is, it means that there is too much clay in the solution, and a little more sand is added to the next batch for the elasticity of the solution. There is another way to test the suitability of the mortar for masonry.  The dried ball from the solution should not crack if it falls from a height of one meter onto a hard surface, and after calcining at high temperatures (in the oven, oven), do not fall apart into dust. If the clay ball has resisted in all tests, then the ratio of clay and sand for the kneading of the solution is chosen appropriate. Such a solution can be safely used for laying out the future heating structure; it will not fail and will not pour out of the furnace joints.
Important! If before starting work carefully sift the sand and clean it from coarse impurities, the builder will not have to spend time removing small stones and other unwanted objects from the mortar for laying bricks.
Furnace calculation
Even before the start of the purchase of materials, it is important to calculate the required amount of bricks. If the calculation is wrong and the material is not enough, then the completion of the work will be delayed, and the purchase of excess brick will increase the already significant costs for the construction of the furnace. Stoves use a simple formula for calculating bricks. It must be remembered that the accuracy of the calculations made will be conditional and allows for some error in one direction or another. 
How to calculate the bricks for the construction of the furnace:
- Calculate the number of bricks required for laying the first (lower) row of the stove.
- The height of the future furnace in centimeters (the distance from the foundation to the ceiling) is divided by the height of one brick row (6.5 cm). As a result, count the future number of brick rows.
- The resulting number of rows is multiplied by the number of bricks in the first (lower) row and takes 30 cm of the total number (the height that the fastening solution will take). Thus, the total number of bricks needed (in pieces) is calculated.
- Dimensions of standard red brick: length 25 cm, height 12.5 cm, width 6.5 cm.
- The base of the future furnace has a perimeter of 2.5 m by 3.5 m, that is, the total length of the perimeter is 1200 cm. The length of the perimeter (1200 cm) is divided into 25 cm (the length of a brick laid flat). As a result of the division, they find out that 48 bricks will fall to the bottom row.
- The next necessary calculation is the height of the future structure. In the above example, the height of the structure from the ceiling to the zero row is exactly 2.40 m. 30 cm are subtracted from the height of the structure (240 cm) (cutting height), as a result 210 cm remain.
- cm divided by 65 mm (brick row height) and as a result, 32 rows of bricks are obtained.
- rows (indicating height) are multiplied by 48 (the number of bricks in the first row) and get 1,536 pieces of bricks. To this amount, 5% is added in case of material or non-standard combat - 76 bricks.
 Total: for the construction of the furnace it is necessary to purchase 1612 bricks. Based on these calculations, the material is purchased at a hardware store or at a brick factory.
Did you know? In medieval Germany, the profession of chimney sweep was popular and in demand. Since the stoves were mostly heated with coal, homeowners often required its services. In the old German prints you can see the figure of a chimney sweep fanned with romance in a high hat, with a hank of rope on his shoulder and a ladder in his hands.Calculation of bricks for the chimney
To make the task easier, let’s take it as an axiom that about 84 bricks are used in one running meter of the chimney (14 rows of 6 pieces each are laid out).
Find out which wood is better.
Illustrative example:
- If it is necessary to build a chimney of brick 4.5 m long, then you need to multiply the future length by 84 bricks. According to the results of the calculation, it is determined that for the construction of the pipe one needs to buy 378 bricks.
- Despite some inaccuracies of such a calculation, it is very convenient to use the formula. The main thing is to carefully enter the initial data in order to correctly calculate everything.

For the construction of the stove in addition to bricks are also needed:
- cast iron grate for the bottom of the combustion chamber (25x25 cm);
- cast-iron heat-resistant door with a handle and a lock for the combustion chamber (25x21 cm);
- cast-iron heat-resistant door with a handle and a lock for ash pan (14x14 cm);
- cast iron hob with one or two opening hobs (with circles);
- two cast iron dampers for the chimney;
- ceramic or metal chimney pipe through the attic to the street;
- metal corner (30x30x4 mm) for screed external corners of the structure - 7 m;
- for the stove with integrated water heating circuit need a water tank.
To reduce the cost of stove design, you can make a water tank using a welding machine. For its manufacture it is necessary to take a metal no thinner than 4 mm. Often, a water tank is also made of steel pipe with a diameter of 25 mm or 32 mm. Чтобы изогнуть стальную трубу, её накаляют в местах сгиба огнём паяльной лампы и гнут горячий металл в нужную сторону. For a stove with a hot water circuit, it is necessary to provide for a constant circulation of water. If this is not done, the metal will quickly burn out. To prevent burnout, an electrical pump is connected to the system. 
Did you know? By decree of Peter I, Dutch stoves were introduced into Russian use. The adherent of everything foreign, the king did not take into account that such furnaces, unlike the Russians, cool down quickly and are not quite suitable for the frosty Russian winters.
Step by step instructions for proper stove installation
For the result of the construction of the furnace in the house to be satisfactory, you need to adhere to some rules and recommendations.
Choosing a place
Each stone oven transfers heat to the room in two ways: using infrared radiation emanating from hot walls, and by heating the air circulating in the room (convection). From this we can conclude: for effective heating it is necessary that the furnace structure or its part be in a room that needs heating.
We build a tandoor and a brazier at our dacha.
Given this requirement, you can give a few tips on choosing a place to install a stove in a country house:
- If you need to heat a large room, it is better to place the oven in the middle, slightly moving it in the direction of the outer wall, from where the cold comes. For heating at the same time two or four adjacent rooms, the design is placed in the middle of the house, to achieve the best result, part of the interior partitions must be dismantled.
- In a small house of three rooms and a kitchen, the stove heats only the kitchen and the hall. The remaining two small rooms adjoin the hall. For their heating, you can use the central heating system (batteries) and the circulation pump, which "drives" hot water through the batteries, heated in a furnace water tank.
- It makes no sense to build a stove next to the outer walls. There is no need to heat them, because some of the heat just goes into the street.
- The hob, oven and firebox should be located in the kitchen, and the back wall of the stove should be in the living room or bedroom.

Important! When planning the stove you need to make sure that the future chimney does not fall into the end of the roof. If, however, the calculations show a similar situation, it is better to move the structure by 20-40 cm to the side.
Training
Before the start of construction work prepare a solid foundation for the design. It is quite heavy, so it is unacceptable to build it directly on the floor, even if the floors are made of cement screed. The base of the stove is a separate structure, not connected with the base of the building. If necessary, build a stove (corner fireplace) near the walls, a gap of at least 15 cm is made between them, and the minimum gap between the foundations of the house and the stove should be at least 10 cm. 
If the floors in the house are wooden, it is recommended to follow the step-by-step instructions to install the stove foundation:
- The floorboard is removed, a stove foundation is built in the pit, its base is wider and longer by 5 cm in each direction from the dimensions of the future furnace. The depth of the foundation of the stove is equal to the depth of the foundation of the house.
- Pour a cushioning layer of sifted sand to a height of 0.10 m.
- The foundation contour is laid out of stone or brick, then it is filled with a liquid cement mortar, reinforcements or stones are placed there for the fortress.
- After the previous layer hardens, a double layer of roofing material is laid.
- Then lay a layer of non-combustible materials, for example, asbestos (at least 6 mm thick).
- The next layer of the foundation is thin iron, on which the bedding is laid under the brick walls. Felt presoaked in a liquid cement mortar or non-combustible basalt cardboard is well suited for this. Wet litter laid out on the iron layer in the wet. After that, provide some time for drying and only then begin work on laying bricks.
- The foundation is left for 3 weeks, this time period is necessary for complete curing of the concrete mix. After this time, you can begin work on the construction of the furnace walls.
Did you know? In Russian villages, the stove was the "heart" of the house. All daily events took place around it: bread was baked in it and food was prepared, a hut was heated and it was asleep. When the house cooled in the morning, the people sleeping on the stove were still warm and comfortable.
 A few tips on how to build a stove:
- To successfully build a furnace, the furnace is laid out of heat-resistant, refractory bricks. This brick is resistant to high temperatures. Only furnace and ash compartments are laid out of it, since the material has the worst heat exchange properties (it heats up longer) compared to ordinary red bricks. The price of heat-resistant bricks is almost two times higher than that of ordinary red.
- Before you start laying walls, bricks need to be soaked. The brick is placed in water for about 4 hours; during this time, the porous material nourishes enough water.
- When laying bricks should be placed as accurately as possible, immediately, during the working process, immediately aligning the error. If the bricks are already laid, they can not be further moved from their place.
Furnace design
The channel stove, shown in the figure on the left, is the easiest to build. The heating passages are connected with the furnace compartment only by the furnace throat, so this stove is suitable for any finished house. Among the shortcomings: the efficiency of channel-type furnaces is low (40-50%), it is very difficult to build a container for heating water in them, since a large heat flux circulates inside the structure, any violation of which leads to a drop in heat transfer and increased soot formation. The central part of the picture is occupied by a Swedish stove.  The most successful option when you need to combine heating and a device for cooking in one. The efficiency of a Swedish stove is about 60%. The design looks like a stove with an air chamber (oven) that flows around the hot air stream. It also heats up perfectly from the floor to the ceiling of the room, thanks to its many smoke channels. The chamber of the furnace glows the cast-iron cooktop (No. 2), and half of the warm air passes into the drying chamber (No. 3).
Did you know? In the culture of Japan, there was never even such a thing as a stove. In the Middle Ages, wealthy people were heated with the help of roaster with coals, warm clothing and blankets. In modern Japan, instead of stove or central heating, local electric heating is applied (electric blanket, electric carpet).
The advantages of this design:
- The oven has no return heat exchange with the combustion chamber, so you can build a heat exchanger with capacity in the oven from the side. Burning out, flue gases get into the furnace passages with t ° not higher than +800 ° C, therefore, simple brick and cement mortar can be used to build them.
- A tall but narrow convector with the same intensity warms the entire height of the living rooms.
- Some of the flue gases from the exit from the chamber can be redirected, for example, under a sunbed, and then returned back to the labyrinth of moves, without compromising the convection parameters.
- You can also reduce or increase the size of the convector in the structure, move or rotate it relative to the chamber part. Therefore, the Swedish stove fits perfectly into the already finished house and can easily heat up to three rooms, which can be seen in the figure (after the channel stoves).
- When you open the oven door, a strong heat flow will go out of it, allowing you to quickly heat the room.

There are few cons of the design, but they are still there:
- Only materials of the highest quality are needed for the masonry of the chamber part of the structure and an experienced specialist stove.
- A Swedish stove is never built without a foundation; in its absence, the whole structure will be fragile.
Did you know? In Victorian England in the common room there was a fireplace for heating the room, it was heated with wood and peat. Bathrooms and bedrooms were never heated by the British in order to save.Bell furnace - has the property of a damper: if you forget to close the usual damper, then the hot smoke under the hood will not let heavy cold air out of the flue orifice into the duct, and the stove will not cool. This property protects the owners from carbon monoxide poisoning due to too early closed dampers (views).

The disadvantages of this design:
- Difficulty in manufacturing, as the design provides for high loads.
- It is impossible to build in a cooking surface into the bell-top oven.
- It is possible to use a water heater only in two bell-shaped structures, which are doubly difficult to manufacture.
- It was these shortcomings that prevented the widespread adoption of this model of stove.
Below you will find a step-by-step guide for building a Swedish oven:
- First row - its layout is very important work, all angles are checked by a special goniometer, the horizontal position of the row is controlled by the water level. How well the first row of bricks will be laid will affect the whole construction. Oven full face is laid out of a brick in three quarters. This is due to the fact that the front panel are located blower or ashpit.
- Second row - immediately installed on the solution of the ash pan door. When the doors are installed, stack the second brick row.
- Third row - bricks are laid out on the bricks of the second row, when the third row is laid out, it will tightly fasten the doors of the blower.
- Fourth row - bricks begin to lay from left to right, the very first door is installed for cleaning soot from chimney moves, then bricks are laid. In the process of laying the ash pan door is laid on top of a brick.
- Fifth row - in the same way as the fourth.
- Sixth row - simultaneously with the usual red brick, heat resistant bricks are placed in the right places. But in ordinal schemes such a brick is depicted as shaded. In order to lay the grate - in the right places the bricks are cut with a grinder or beat off the excess with a pickaxe. This is done to ensure that the wood more conveniently placed on the grate. The cast-iron grating is laid on the bricks of the previous row. The stove-builder should definitely keep the centimeter gap between the 6th row of laying and the grate. Ash or sand is poured into the gap; these materials act as a compensator when the cast iron grate is heated.
- Seventh row - at this time, the overlapping of the U-shaped chamber begins, simultaneously laying 3 channels in its place. At the same time, the firebox door, which rests on the sixth row, is installed with the help of a mortar.
- Eighth and Ninth Rows - continue in the same way as the seventh row. When these rows are laid out, the walls and the doors of the combustion chamber become equal in height.
- Tenth row - in it the heat-resistant brick is used in the right places. At this stage it is necessary to check the verticality of the rows with a water level. Such verification requires further installation of a cast-iron cooking hob. The door of the combustion chamber in the tenth row is laid on top of bricks.
- Eleventh row - laid out with refractory bricks, a cast-iron plate for boiling is installed over the firebox. The edge of the brick, which comes close to the brewing plate, must be cut so that as a result there is a gap of 20 mm between them. In this row also mounted a large door for the cooking chamber. It will be established by the basis on the previous row. In this case, the stove will combine the cooking chamber with the oven.
- Twelfth row - reduces the 2 left channels into one rectangle, and in the thirteenth row these channels diverge again.
- Fourteenth row - completely repeats the 13th, with one exception: a flap is installed here that directs all the heat to the cooking surface without heating everything else. This is done so that the stove can be used in the summer. After the flap is opened, all other functions of the stove come into effect.
- Fifteenth row - brick overlaps the slit for the valve.
- Sixteenth row - in it the brickwork overlaps the doors of the cooking chamber. An exhaust door is installed in the left part between the cooking chamber and the front left chamber, opening which the hostess can remove smoke, steam and the smell of cooking from the kitchen.
- Seventeenth row - the exhaust door is overlapped, and above the cooking chamber, 2 reinforcing rods are bricked into the masonry, on which the cooking stove will be placed later.
- Eighteenth and nineteenth rows - block the cooking chamber, and 2 left channels remain in operation.
- Twentieth row - where it is necessary to block the cooking chamber, two bricks are laid on the edge. At the same time, they ensure that the distance from the back wall of the stove to the bricks installed on the edge is 40 mm. Two doors are also mounted in the tab: the first is for the samovar pipe, the second is for cleaning the smoke outlets from soot.
- Twenty first row - completely repeats the previous one.
- Twenty second row - masonry covers all previously installed doors, as a result, 2 channels of square section remain again. Above the cooking chamber you end up with 3 channels elongated in length: two extreme 110 mm each, medium - 50 mm.
- Twenty third row - closes 2 long channels, for this, masonry is used with bricks installed across.
- Twenty fourth row - laid out exactly the same as the 23rd.
- Twenty-fifth and twenty-sixth rows - laid out completely identical to the 22nd.
- Twenty-seventh row - in it you need to install 3 bricks on the edge. They are installed at the same distance from each other and from the walls of the stove.
- Twenty eighth row - similar to the previous one. The bricklayer needs to pay attention to the seams between the masonry.
- Twenty ninth row - by this time only one of the square channels is open. Two bricks are installed in front of the wall, half down and resting on the bricks laid on the edge.
- 30th row - masonry closes all channels except one. Remains an open smoke channel in which the valve is mounted.
- Thirty first and thirty second rows - already form 3 brick rows above the canals. It is necessary for fire safety.
Video: heating stove
Furnace finish
The finished stove can be finished with tiles or heat-resistant tiles, which are selected in size and color. Begin work on the decorative finishing of the finished structure from the bottom up, that is, the first row of tile is laid at the very floor. The furnace has also been plastered. For the kiln plaster made a solution of clay of good viscosity and water.
Video: Furnace Tile Finish
Exploitation
After the construction is completed, a pause of at least two weeks is maintained. Then the furnace is first flooded. Firewood must be dry, otherwise if a fire starts, smoke may come into the room and an unpleasant smell may appear. During the initial heating should pay attention to whether there is smoke in the room, whether there is draft in the chimney. If everything is in order, the stove is ready for further use. A wood-burning stove needs annual soot cleaning of the chimney. If coal or peat is used as fuel, the chimney should be cleaned every two to three months. Ignoring this procedure can cause soot fire in the chimney and fire.
Did you know? The Russian stove is always present in folk tales: the bogatyr Ilya Muromets lay on it for 33 years, while the evil Baba Yaga puts him on a spade of good fellows in it. On the stove went, smesha people, lazy Emelya.Using our advice, the homeowner can lay down a good stove that will heat his house or cottage for many decades. It remains only to carefully weigh the pros and cons and choose the appropriate type of stove for your home.